The Miniature Chronicles
Introduction
I've been playing tabletop RPGs for a while now, and I have always run into the same problem: I can't seem to find a good miniature to represent my character. The most recent disappointments are my no-name Star Wars character who is a Coynite. Apparently no one knows that race exists. The second is Zerkos Democritus in Ryan's FantasyCraft campaign. Zerkos is a human, but he kind of fits a broad spectrum of roles. Anyway, I was searching around online to try and locate a miniature to buy, but I couldn't horking find anything. I eventually stumbled upon a link to "How to create a fantasy miniature". I went ahead out of curiosity and discovered a full video tutorial of each step of this process, even right down to making a mold and casting duplicates. As I watched the videos, I thought to myself "This looks challenging, but I think I can do this." And it was decided that I would create my own miniatures from now on.
The main preliminary step was to create a list of supplies I'd need. It took a while to find everything, but I think I have just about everything I need:
- Modeling clay
- Set of picks
- Set of files
- Tweezers
- Hobby knife
- Metal wire
- Enamel paints
- Tiny paintbrush
- Molding/casting kit
(still waiting on)
So, I'm now ready to begin. My first miniature will be Zerkos Democritus, the Explorer and Keeper. Mike W. and Ryan - the horking naysayers - bet me that I could not create a single miniature
in an entire year's time. That's June 2nd, 20-horking-11. We agreed that the miniature cannot be a piece of crap, and that they will not be jerks about judging this. Out of spite, I will record my progress on this page so that they can watch me get closer to victory.
6/10/10 - Day #1 - Human Anatomy

Yeah, yeah. Everyone has to start somewhere, right?
First things first. I'm not an artist. I took art classes in high school and I wasn't that great. It just so happens that the first step of this process is to draw a sketch of your miniature to work off of. Well, hork. I started with the basics - drawing a rough sketch of a vaguely humanoid entity. This was pretty hard, although I expected it to be. It took me about an hour and a half, so not too bad.
Thoughts so far: "Drawing is hard."
6/13/10 - Day #2 - Mudman
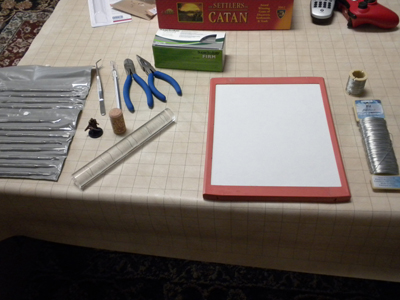
These are the supplies I used.
I was supposed to draw a sketch of what I want my miniature to look like, but I failed. I'm just not good at drawing. Instead, I just got set up and got started on the miniature itself.
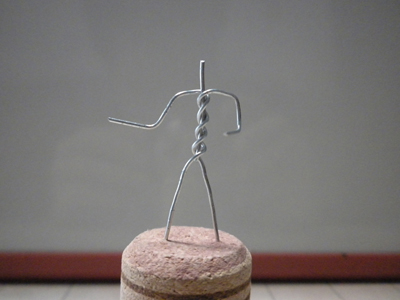
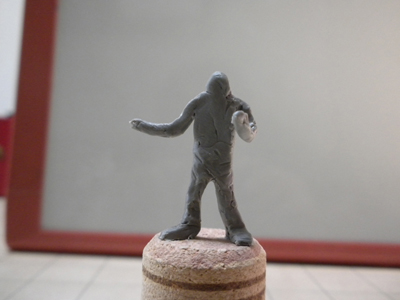
The first step was to create an armature to support the modeling clay. I used floral wire and bent it into shape using pliers. The legs look a little long, but that is because I put the armature into a cork to help support it and so I could use both hands for working on it. I decided to put Zerkos in a fencing pose since that's his fighting style.
With the armature in place, I started to put the modeling clay on. I decided to take a picture of the model before doing any work on it.
Now comes the hard part - sculpting this mess into a human. I did a little bit of sculpting and got it at least a little closer. So anyway, I have my work cut out for me. I did some more last night, but then I had to remove the mini from the cork and I really horked it up. Hopefully I can fix it tonight. More pictures tomorrow.
Thoughts so far: "This is difficult, but I think it's possible, unlike drawing."
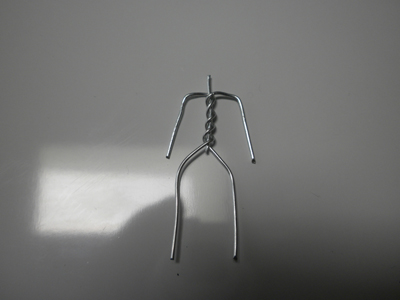
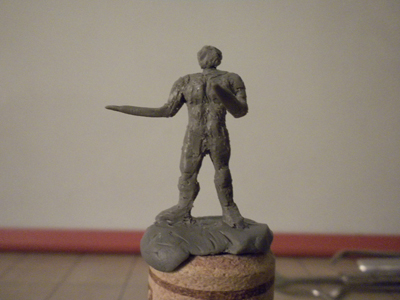
Adamantium skeleton.
Headless fencer.
Little did you know, Zerkos is actually a golem.
Looking more like a mudman than anything else.
6/14/10 - Day #3 - T-1000
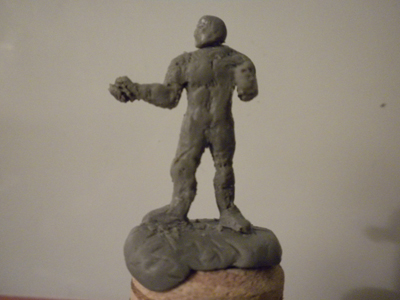
The T-1000.
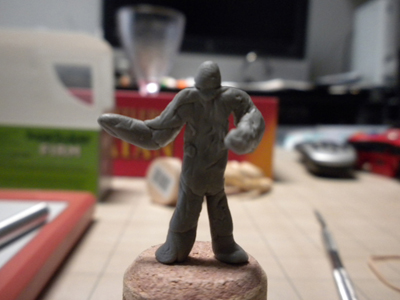
I've gotten a lot of sculpting work done. The model now has some crude musculature and is starting to actually look human in some areas. I still need to work on the head, which will be harder than anything else. In addition, his forearms are too long, making him look like the T-1000. Luckily, I can simply trim the armature down to size. I probably won't do a whole lot more work on the torso because it has the proper shape and most of it will be covered by armor and gear.
Thoughts so far: "This thing is actually starting to come along."
6/16/10 - Day #4 - Arms and Arms
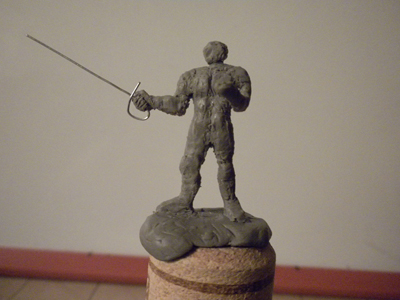
Weapons present a problem.
So, things were going too well before and I was doomed to hit a pitfall. I began to work on the miniature's arms last night, and attempted to place its fencing blade into one of the hands. Unfortunately, the weapon is not part of the original armature, which made this extremely difficult. I did not make the blade a part of the armature because I wanted to use thinner wire for it. The tutorial recommends soldering the piece to the armature, but I'm not going to go out and buy a soldering iron just to use one time on something this tiny.
Anyway, I got the thing into its hand, but then I tried to apply the modeling clay to it and it just failed. The thing was having trouble supporting the weight of the clay and I couldn't get it thin enough to look like a proper blade. I'm not totally sure how to fix this. Right now, I'm thinking I'll have to see if I can get the wire to support a small amount of clay and then fix the blade after the piece has been hardened.
Thoughts so far: "I was due for a problem."
6/23/10 - Day #5 - Facetime
Head starting to take shape.
I didn't make any progress over the past few days because I was at the mansion and didn't want to risk transporting this thing. Tonight, I worked on the left hand and attempted to start working on the head and face. Working on a miniature's face is really horking hard because of the large amount of detail in a tiny area. I also removed the weapon from the hand because I think I can do a better job of what I had before.
Thoughts so far: "This only gets harder."